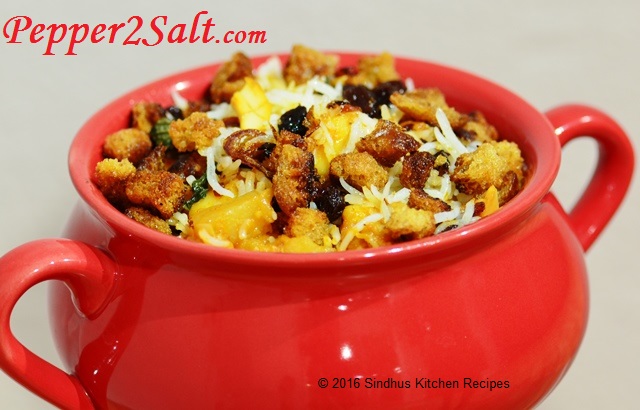
Pretty recently I realized that one of the favorite main course dish of vegetarians- the Vegetable Biryani !!. Here is it, Veg Dum Biryani enriched with Paneer and crispy fried bread pieces. This one course meal is a perfect choice for family gatherings and even for kids lunch boxes …
Ingredients
For rice: –
- Basmati rice : 3 Cup
- Chopped Onion : ½ of small onion
- Ginger –garlic paste : 1 ½ T- Sp
- Ghee /oil : 2 Tbl- Sp
- Mint leaves : 15
- Whole garam masala (cardamom 2, cinnamon 1, cinnamon 2, bay leaves 2)
- Coconut milk : ½ Cup
- Water : 3 ½ Cup
- Salt for taste
For masala: –
- Chopped onion : 1 (small)
- Chopped tomato : 1 (medium)
- Green chilly : 3
- Mixed veg : 1 ½ Cup (potato, carrot, beans)
- Paneer : 1 ½ Cup
- Chopped mint : 15 leaves
- Ginger-garlic paste : 1 Tbl- Sp
- Vinegar : 1 T- Sp
- Chilli powder : 1 Tbl- Sp
- Turmeric powder : ¼ t-Sp
- Garam masala : ½ T- Sp
- Coconut milk(thin) : 1 Cup
- Thick coconut milk : ½ Cup
- Salt for taste
- Ghee/oil : 1 ½ Tbl- Sp(Adjust)
For seasoning:-
- Thinly sliced onion : 1 (medium)
- Cashews : 15
- Raisins : 20
- Bread slices : 2
- Ghee/oil for frying
- Ghee for sprinkling
Method
- Wash and soak the rice for about 15 minutes.
- Heat oil/ghee in a pressure cooker and add the whole masala, fry it for about 20 seconds.
- Then add the onion along with ginger along with garlic paste and sauté the onion till translucent.
- Add the mint leaves and sauté it.
- Dilute the coconut milk with water and add this to the pressure cooker.
- Add the rice and salt; mix it.
- Close the lid and wait for 1 whistle, then reduce the flame to low and wait for another 1 minute. (this extra 1 minute needed only for gas stove). If you are using coil stove top, only 1 whistle needed, after that switch off the stove and keep it in the stove itself.
- After the pressure releases, open the cooker and transfer the rice into a wide plate /tray.
Masala:-
- Now heat oil/ghee in a pan and sauté the onion along with ginger-garlic and green chilli, till onions became brown.
- Add the tomatoes, sauté it until smashed well.
- Add the chilli powder and turmeric powder; fry it for a minute.
- Add the vegetables along with salt and stir it.
- Add the thin coconut milk and close the lid and cook it. Stir it in between to avoid sticking in the pan.
- Now add the mint leaves along with paneer pieces and vinegar, close the lid and cook it for another 3-4 minutes.
- If there is any excess water, dry it off to make a thick masala.
- Finally add the thick coconut milk and mix it. Take it out and keep it aside.
For dum:-
- Spread oil in an oven safe dish/tray and put one layer of rice, and after that one layer of masala.
- Sprinkle some ghee on top of the masala and spread another.
- Repeat this for another layer of masala and rice.
- On the top a layer of rice, spread the fried onion, cashews and raisins along with some chopped mint leaves.
- Sprinkle ghee and cover tray tightly with aluminum foil/tray cover.
- Preheat the oven into 400 degree Fahrenheit and bake it for about 25 minutes.
- Add the fried bread pieces on top at the time of serving the biriyani.
Tips :
- Before adding to the masala keep the paneer pieces in hot water, it will help the paneer to be soft.
- I soaked the rice for about 15 minutes. so I needed total 4 cups of water including coconut milk. The water quantity may vary each rice. Typical ratio is 1 cup rice =1.5 cup of water.
- Can adjust the quantity of vegitable and paneer.
- Spreading the rice in a wide plate/tray is very important, it will make the rice non-sticky.
- The number of layering of rice/masala is personal choice. First and last layer should be rice.
- Sprinkling the ghee will give the biriyani, more taste and aroma.
- I chopped the bread into small pieces for frying.